Nginx WordPress + WP-FFPC Plugin Setup + ngx_pagespeed
Discuss Wordpress and Centmin Mod Nginx on the forums here.
The Centmin Mod outlined WordPress fastcgi caching guide might not be everyone's cup of tea. So I'll out line an alternative WordPress caching method via WordPress plugin called, WP-FFPC (Fast Full Page Cache) which utilises Memcached server (via PHP memcache or PHP memcached) or via APC Cache. All three methods are supported and installed by default on Centmin Mod v1.2.3 based servers (when default unattended method of install is used).
When WP-FFPC plugin and Nginx ngx_pagespeed module are paired together, they make a perfect couple with WP-FFPC taking care of caching and Nginx ngx_pagespeed taking care of optimising static css, js and image page elements replacing the more common but complicated W3 Total Cache plugin. WP-FFPC support forums are located here if you need help.
I'd like to thank Centmin Mod Google+ Community member, Farzana for giving me the heads up for WP-FFPC plugin. It's my first time using WP-FFPC plugin.
Last revision: Wednesday February 12th, 2014 (previous revision: Tuesday January 7th, 2014)
Update notes:
- Added updated info on version 0.14 changes to WP-CLI tool.
- Added example WP-CLI plugin install and activation commands.
- Revised /usr/local/nginx/conf/wpffpc.conf.
- Added PHP disable_functions note
- Fixed /usr/local/nginx/conf/wpsecure.conf
Contents
I've broken this guide down into 6 sections:
- Configure MySQL for InnoDB Engine Tables
- WP-CLI version 0.14+ changes
- Installing WordPress
- Installing WP-FFPC plugin
- Check to see if WP-FFPC plugin is working
- Enabling ngx_pagespeed module
Configure MySQL for InnoDB Engine Tables
Enable InnoDB MySQL Engine and Table support by ensuring your MySQL config settings for /etc/my.cnf have the following InnoDB related settings set. If not set in /etc/my.cnf change them to the following and restart MySQL server:
innodb=ON
default-storage-engine = InnoDB
On a fresh Centmin Mod install, you may also want to enable server wide MySQL global UTF-8 support. Enabling this will apply to every MySQL database and tables you create on your MySQL server instance. To change defaults respectively for character set and collation to utf8 and utf8_general_ci, you need to add under [mysqld] group in /etc/my.cnf the following line character-set-server=utf8:
[mysqld]
 character-set-server=utf8
Note: Only MySQL databases and tables created after this change will by default be created as utf8 character set and collations. Any databases before this change, will still be latin1.
Restart MySQL server:
service mysql restart
Or restart with Centmin Mod command shortcut:
mysqlrestart
WP-CLI version 0.14+ changes
WP-CLI version 0.14 was released with changes to prevent the tool from being run as root user. When you run WP-CLI command as root user you will get the below warning and suggestions on 2 ways to now run the tool. For now with Centmin Mod, you would need to use --allow-root flag. At least until future Centmin Mod versions support proper chrooted and jailed individual user accounts (see preview of this feature here).
Running command:
wp --info
will now result in warning below
Error: YIKES! It looks like you're running this as root. You probably meant to run this as the user that your WordPress install exists under.

If you REALLY mean to run this as root, we won't stop you, but just bear in mind that any code on this site will then have full control of your server, making it quite DANGEROUS.

If you'd like to continue as root, please run this again, adding this flag:  --allow-root

If you'd like to run it as the user that this site is under, you can run the following to become the respective user:

    sudo -u USER -i -- wp ...
You don't have to worry about the warning, as below instructions to chown the public directory to nginx user/group changes the ownership of such WP-CLI created files.
chown nginx:nginx /home/nginx/domains/yourdomain.com/public/wp
chown -R nginx:nginx /home/nginx/domains/yourdomain.com/public/wp
To run command now with 0.14, you need to run as:
wp --info --allow-root
output:
PHP binary:     /usr/local/bin/php
PHP version:    5.5.8
php.ini used:   /usr/local/lib/php.ini
WP-CLI root dir:        phar://wp-cli.phar
WP-CLI global config:
WP-CLI project config:
WP-CLI version: 0.14.0
2. Installing WordPress
To download, configure and install WordPress, I am going to use Centmin Mod included addon for WP-CLI. With this tool you can quickly install WordPress without leaving your SSH telnet window.
- First, change to addons directory where you downloaded Centmin Mod zip and extracted it's contents. For this example, it's located at /usr/local/src/centmin-v1.2.3mod/addons/.
- Then chmod executable permissions on wpcli.sh file.
- Then run wpcli.sh script install command to install WP-CLI
- Then run /root/.wp-cli/bin/wp --info to see if it's installed properly
- Then exit your SSH telnet window session and re-log into SSH telnet
The above 5 steps outlined below. Run these commands in SSH telnet as root user:
cd /usr/local/src/centmin-v1.2.3mod/addons/
chmod +x wpcli.sh
./wpcli.sh install
wp --info --allow-root
exit
Create MySQL database for WordPress install. Type following command where database name = wordpressdb381:
mysqladmin -u root -p create wordpressdb381
Then log into MySQL client command line via command below. When prompted for MySQL root user password, enter the password. If you didn't set a MySQL root user password, just hit enter when prompted for password.
mysql -u root -p
Create MySQL user where mysqlusername = your MySQL username and mysqluserpassword = your MySQL username's password and wordpressdb381 = your MySQL database name.
MariaDB [(none)]> CREATE USER 'mysqlusername'@'localhost' IDENTIFIED BY 'mysqluserpassword';
Grant appropriate MySQL privileges to the MySQL user you created and then assign the MySQL user to your MySQL database name. And issue FLUSH PRIVILEGES; command to make changes take effect.
MariaDB [(none)]> GRANT SELECT, INSERT, UPDATE, DELETE, CREATE, DROP, INDEX, ALTER, LOCK TABLES, CREATE TEMPORARY TABLES ON wordpressdb381.* TO 'mysqlusername'@'localhost';
MariaDB [(none)]> FLUSH PRIVILEGES;
If you need to remove MySQL user later on, use following command when logged into MySQL client command line.
MariaDB [(none)]> DROP USER 'mysqlusername'@'localhost';
MariaDB [(none)]> FLUSH PRIVILEGES;
If you need to change MySQL user's password, use following command when logged into MySQL client command line.
MariaDB [(none)]> SET PASSWORD FOR 'mysqlusername'@'localhost' = PASSWORD('newpassword');
MariaDB [(none)]> FLUSH PRIVILEGES;
Now to install WordPress using WP-CLI command. I'll be installing WordPress to subdirectory at /wp. There are 7 steps to installing WordPress via WP-CLI within SSH telnet:
- Change to directory path where you want to install WordPress at /wp
- Run wp core download command to download latest WordPress release to /wp
- Run wp core config command and specify your database name created above and MySQL username created above
- Optional: using nano text editor, edit wp-config.php and add the password to the wp-config.php and save and exit from nano (CTRL+X and when prompted hit yes to save)
- Randomise Wordpress database table PREFIX within wp-config.php
- Run wp core install command, changing your url to yourdomain.com/wp, the title to your WordPress blogs name, set the Admin user's email address, password and admin_name = WordPress Admin username.
- Change /wp directory and files user and group permissions to same as Nginx server user/group = nginx
Run the following commands within SSH telnet to go through the above 6 steps:
cd /home/nginx/domains/yourdomain.com/public/wp
wp core download --allow-root
wp core config --dbname=wordpressdb381 --dbuser=mysqlusername --dbpass=mysqluserpassword --allow-root
nano -w wp-config.php
NEWPREFIX=$(echo $RANDOM)
sed -i "s/'wp_';/'${NEWPREFIX}_';/g" wp-config.php
wp core install --url='http://yourdomain.com/wp' --title='your wordpress site title' --admin_email='[email protected]' --admin_password='yourwordpressadminpass' --admin_name=adminuser --allow-root
chown nginx:nginx /home/nginx/domains/yourdomain.com/public/wp
chown -R nginx:nginx /home/nginx/domains/yourdomain.com/public/wp
WP-CLI plugin installs
Now you can opt to install some highly recommended Wordpress plugins for extra security. You can install them using WP-CLI commands too for instance to install and activate the following recommended plugins just type:
make sure to type these commands within your Wordpress installation directory i.e. /home/nginx/domains/yourdomain.com/public/wp
cd /home/nginx/domains/yourdomain.com/public/wp
wp plugin install wp-security-scan --activate --allow-root
wp plugin install sucuri-scanner --activate --allow-root
wp plugin install ssh-sftp-updater-support --activate --allow-root
wp plugin install disable-xml-rpc --activate --allow-root
wp plugin install limit-login-attempts --activate --allow-root
wp plugin install wp-updates-notifier --activate --allow-root
wp plugin install no-longer-in-directory --activate --allow-root
Then give plugin files and directories appropriate permissions as nginx user by typing:
chown -R nginx:nginx /home/nginx/domains/yourdomain.com/public/wp/wp-content/plugins/
You should see the following user and group set to nginx user/groups:
  total 48K
drwxr-xr-x 10 nginx nginx 4.0K Jan  7 15:18 .
drwxr-xr-x  6 nginx nginx 4.0K Jan  7 15:18 ..
drwxr-xr-x  3 nginx nginx 4.0K Jan  7 14:46 akismet
drwxr-xr-x  2 nginx nginx 4.0K Jan  7 15:05 disable-xml-rpc
-rw-r--r--  1 nginx nginx 2.3K Jan  7 14:46 hello.php
-rw-r--r--  1 nginx nginx   30 Jan  7 14:46 index.php
drwxr-xr-x  2 nginx nginx 4.0K Jan  7 15:06 limit-login-attempts
drwxr-xr-x  3 nginx nginx 4.0K Jan  7 15:08 no-longer-in-directory
drwxr-xr-x  5 nginx nginx 4.0K Jan  7 15:09 sucuri-scanner
drwxr-xr-x  3 nginx nginx 4.0K Jan  7 15:18 wp-ffpc
drwxr-xr-x  3 nginx nginx 4.0K Jan  7 15:04 wp-security-scan
drwxr-xr-x  3 nginx nginx 4.0K Jan  7 15:07 wp-updates-notifier
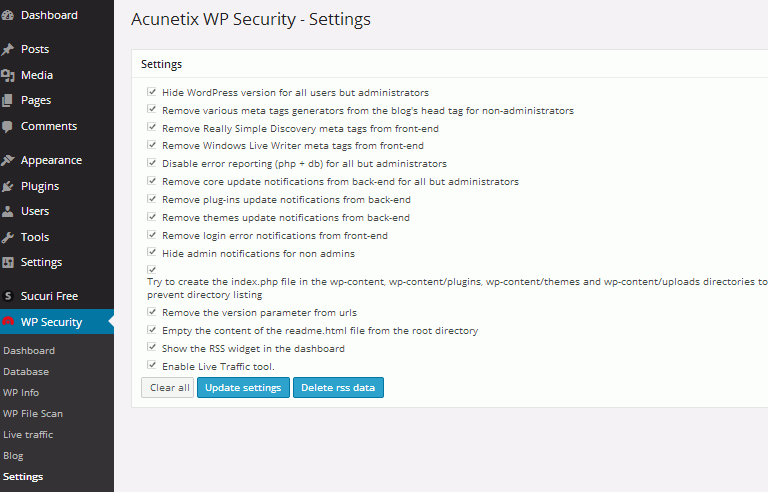
Tips: be sure to look in Wordpress Admin panel to any relevant plugin settings you may need to properly configure.
For instance, Acunetix needs all settings checked and hit the update button to the security changes to take effect.
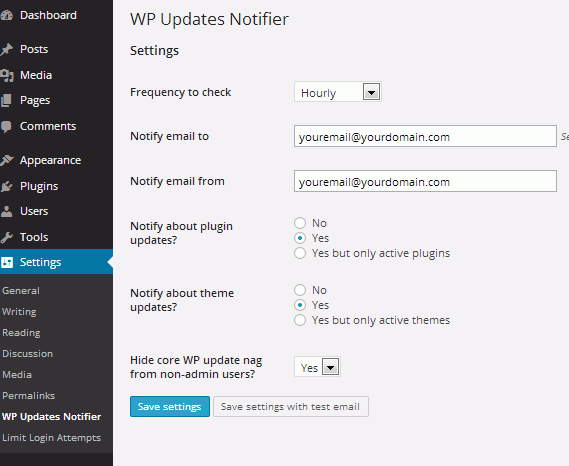
For WP Updates Notifier need to set your email address
3. Install WordPress WP-FFPC Plugin
Two methods of installing WP-FFPC plugin
1. via WP-CLI command line
make sure to type these commands within your Wordpress installation directory i.e. /home/nginx/domains/yourdomain.com/public/wp
cd /home/nginx/domains/yourdomain.com/public/wp
wp plugin install wp-ffpc --activate --allow-root
Then give plugin files and directories appropriate permissions as nginx user by typing:
chown -R nginx:nginx /home/nginx/domains/yourdomain.com/public/wp/wp-content/plugins/
Then you still need to configure WP-FFPC as per outlined guide.
2. via traditional plugin upload
There are 5 steps to installing and configuring WP-FFPC plugin:
- Upload contents of wp-ffpc.zip to the /wp-content/plugins/ directory or install via WordPress Dashboard's Plugins -> Add New feature
- Enable WordPress cache by adding define('WP_CACHE',true); in wp-config.php. I added line right after DB_COLLATE line.
- Activate the plugin through the Plugins menu in WordPress ( site or Network wide )
- Check the settings in Settings ( site or Network Admin, depending on activation wideness ) -> WP-FFPC menu in WordPress.
- Save the settings. THIS STEP IS MANDATORY: without saving the settings, there will be no activated caching!
Install WP-FFPC files
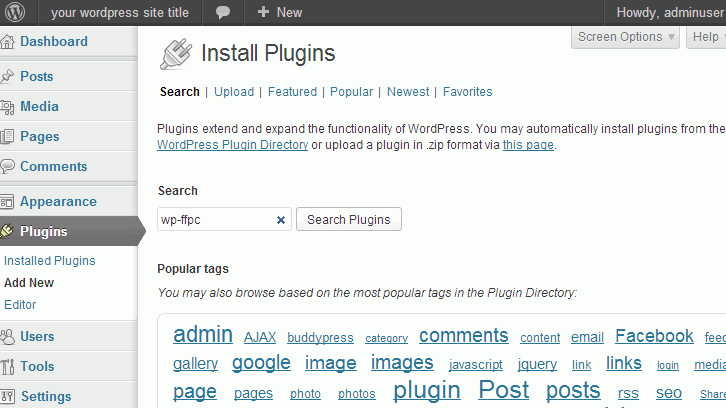
Upload contents of wp-ffpc.zip to the /wp-content/plugins/ directory or install via WordPress Dashboard's Plugins -> Add New feature
Go to Add New
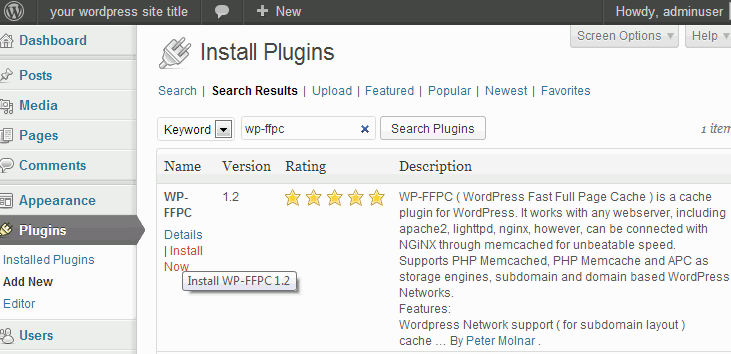
Search for wp-ffpc plugin
Click install
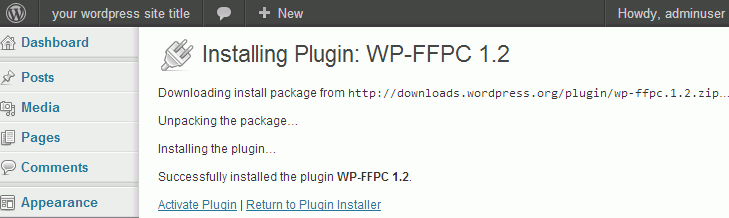
Successful install
Enable WordPress cache
Enable WordPress cache by adding define('WP_CACHE',true); in wp-config.php. I added line right after DB_COLLATE line as follows:
/** Database Charset to use in creating database tables. */
define('DB_CHARSET', 'utf8');

/** The Database Collate type. Don't change this if in doubt. */
define('DB_COLLATE', '');

define('WP_CACHE',true);
Activate the plugin
Activate the plugin through the Plugins menu in WordPress ( site or Network wide )
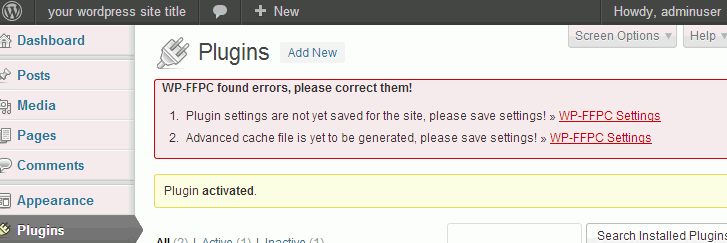
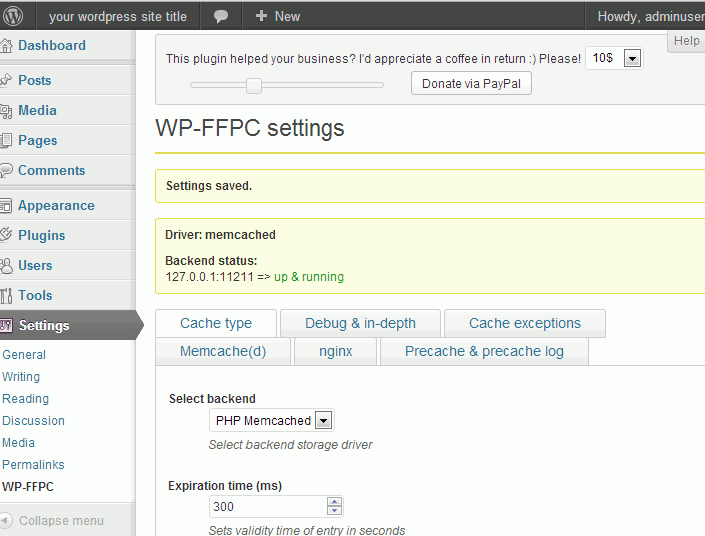
Check the settings
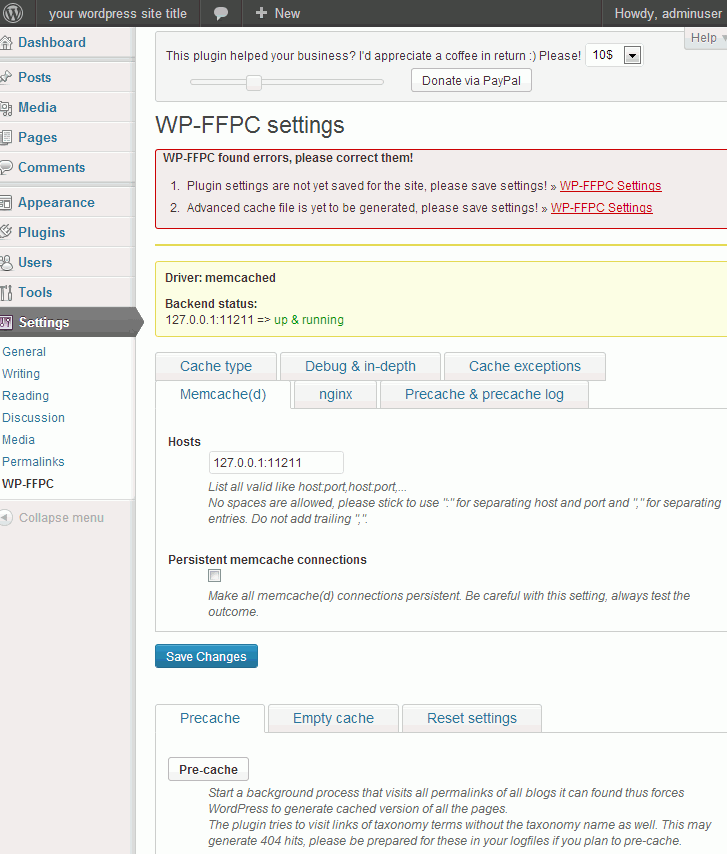
Check the settings in Settings ( site or Network Admin, depending on activation wideness ) -> WP-FFPC menu in WordPress. Select PHP Memcached backend.
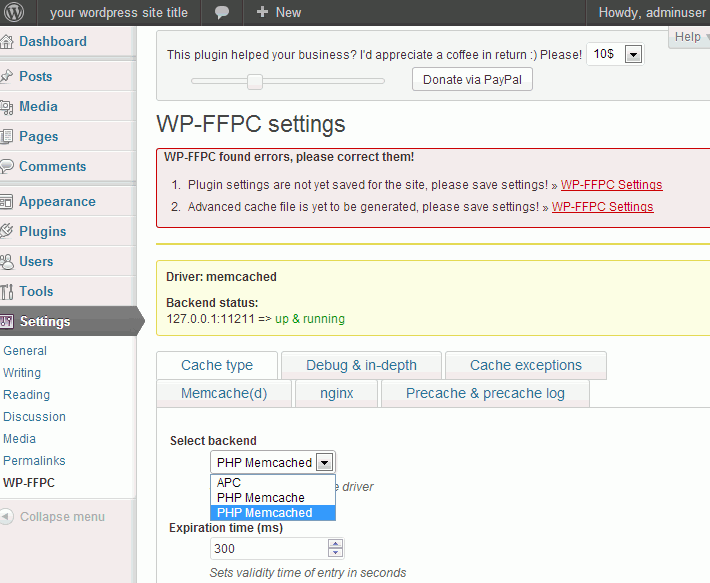
If you have different Memcached server listening address of port from default 127.0.0.1 and 11211, change it here.
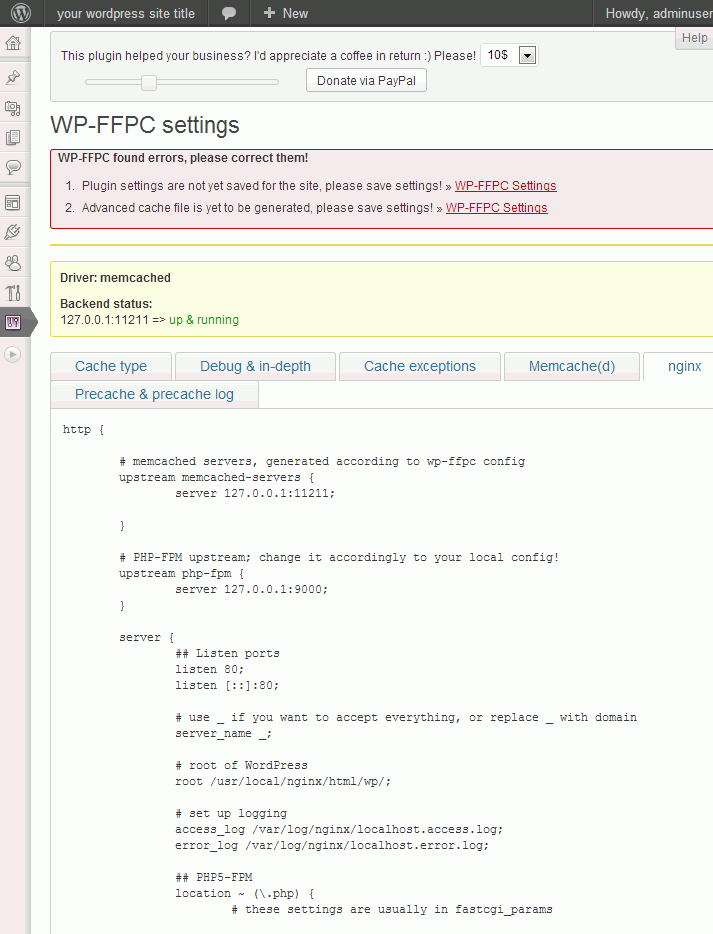
Sample Nginx VHOST generated by WP-FFPC plugin. Only used as guide as not all settings are correct for Centmin Mod VHOST format. So can ignore this.
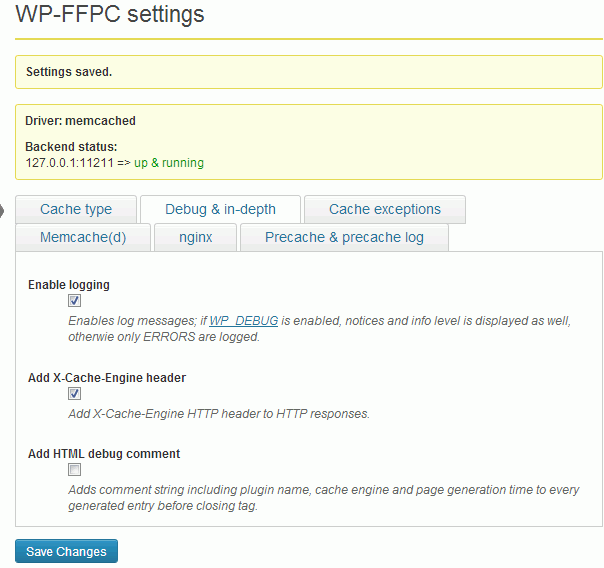
Enable the Add X-Cache-Engine header under Debug menu
Save the settings
Save the settings. THIS STEP IS MANDATORY: without saving the settings, there will be no activated caching!
Create file wpffpc.conf at /usr/local/nginx/conf/wpffpc.conf. For Centmin Mod v1.2.3-eva2000.03 and higher there is already a /usr/local/nginx/conf/wpffpc.conf included. But you may need to revise it slightly for subdirectory Wordpress installs i.e. yourdomain.com/wp.
If you need to create the file or edit it yourself, use pico, vi or nano text editors in SSH telnet type:
nano -w /usr/local/nginx/conf/wpffpc.conf
Update: A few changes made to rewrites for index.php to below configuration for permalinks compatibility.
Original config for Wordpress installed at web root /
  if ( $memcached_request = 0) {
rewrite ^ /index.php last;
}
}

## rewrite rules
location @rewrites {
add_header X-Cache-Engine "";
rewrite ^ /index.php last;
}
Change to updated fixes adding to end of index.php?q=$request_uri for Wordpress installed at web root /
  if ( $memcached_request = 0) {
rewrite ^ /index.php?q=$request_uri last;
}
}

## rewrite rules
location @rewrites {
add_header X-Cache-Engine "";
rewrite ^ /index.php?q=$request_uri last;
}
Or if Wordpress installed at in subdirectory i.e. at /wp, change to updated fixes adding to end of index.php?q=$request_uri. Change /wp accordingly for your own subdirectory install path
  if ( $memcached_request = 0) {
rewrite ^ /wp/index.php?q=$request_uri last;
}
}

## rewrite rules
location @rewrites {
add_header X-Cache-Engine "";
rewrite ^ /wp/index.php?q=$request_uri last;
}
New /usr/local/nginx/conf/wpffpc.conf
So the updated /usr/local/nginx/conf/wpffpc.conf file now looks like below example if installed at web root /.
Add the below contents to /usr/local/nginx/conf/wpffpc.conf
# try to get result from memcached
location @memcached {
default_type text/html;
set $memcached_key data-$scheme://$host$request_uri;
set $memcached_request 1;

# exceptions
# avoid cache serve of POST requests
if ($request_method = POST ) {
set $memcached_request 0;
}

# avoid cache serve of wp-admin-like pages, starting with "wp-"
if ( $uri ~ "/wp-" ) {
set $memcached_request 0;
}

if ($request_uri ~* "/(\?add-to-cart=|cart/|my-account/|checkout/|shop/checkout/|store/checkout/|customer-dashboard/|addons/|wp-admin/.*|xmlrpc\.php|wp-.*\.php|index\.php|feed/|sitemap(_index)?\.xml|[a-z0-9_-]+-sitemap([0-9]+)?\.xml)") {
set $memcached_request 0;
}

if ($http_cookie ~* "comment_author|wordpress_[a-f0-9]+|wp-postpass|wordpress_logged_in|edd_items_in_cart|woocommerce_items_in_cart|woocommerce_cart_hash|woocommerce_recently_viewed|wc_session_cookie_HASH|wp_woocommerce_session_|wptouch_switch_toogle" ) {
set $memcached_request 0;
}

if ( $memcached_request = 1) {
add_header X-Cache-Engine "WP-FFPC with memcached via nginx";
memcached_pass memcached-servers;
error_page 404 = @rewrites;
}

if ( $memcached_request = 0) {
rewrite ^ /index.php?q=$request_uri last;
}
}

## rewrite rules
location @rewrites {
add_header X-Cache-Engine "";
rewrite ^ /index.php?q=$request_uri last;
}
Or the updated /usr/local/nginx/conf/wpffpc.conf file now looks like below example if installed at within a subdirectory i.e. /wp.
Add the below contents to /usr/local/nginx/conf/wpffpc.conf
# try to get result from memcached
location @memcached {
default_type text/html;
set $memcached_key data-$scheme://$host$request_uri;
set $memcached_request 1;

# exceptions
# avoid cache serve of POST requests
if ($request_method = POST ) {
set $memcached_request 0;
}

# avoid cache serve of wp-admin-like pages, starting with "wp-"
if ( $uri ~ "/wp-" ) {
set $memcached_request 0;
}

if ($request_uri ~* "/(\?add-to-cart=|cart/|my-account/|checkout/|shop/checkout/|store/checkout/|customer-dashboard/|addons/|wp-admin/.*|xmlrpc\.php|wp-.*\.php|index\.php|feed/|sitemap(_index)?\.xml|[a-z0-9_-]+-sitemap([0-9]+)?\.xml)") {
set $memcached_request 0;
}

if ($http_cookie ~* "comment_author|wordpress_[a-f0-9]+|wp-postpass|wordpress_logged_in|edd_items_in_cart|woocommerce_items_in_cart|woocommerce_cart_hash|woocommerce_recently_viewed|wc_session_cookie_HASH|wp_woocommerce_session_|wptouch_switch_toogle" ) {
set $memcached_request 0;
}

if ( $memcached_request = 1) {
add_header X-Cache-Engine "WP-FFPC with memcached via nginx";
memcached_pass memcached-servers;
error_page 404 = @rewrites;
}

if ( $memcached_request = 0) {
rewrite ^ /wp/index.php?q=$request_uri last;
}
}

## rewrite rules
location @rewrites {
add_header X-Cache-Engine "";
rewrite ^ /wp/index.php?q=$request_uri last;
}
Nginx configuration and VHOST changes
Edit Nginx config file /usr/local/nginx/conf/nginx.conf. You can use shortcut command:
nginxconf
Add this code just below http { line
http {
# memcached servers, generated according to wp-ffpc config
upstream memcached-servers {
server 127.0.0.1:11211;

}
save nginx.conf
Create a file named wpsecure.conf at /usr/local/nginx/conf/wpsecure.conf and add following lines:
# Deny access to any files with a .php extension in the uploads directory
# Works in sub-directory installs and also in multisite network
location ~* /(?:uploads|files)/.*\.php$ {
deny all;
}

# Make sure files with the following extensions do not get loaded by nginx because nginx would display the source code, and these files can contain PASSWORDS!
location ~* \.(engine|inc|info|install|make|module|profile|test|po|sh|.*sql|theme|tpl(\.php)?|xtmpl)$|^(\..*|Entries.*|Repository|Root|Tag|Template)$|\.php_
{
return 444;
}

#nocgi
location ~* \.(pl|cgi|py|sh|lua)\$ {
return 444;
}

#disallow
location ~* (roundcube|webdav|smtp|http\:|soap|w00tw00t) {
return 444;
}

location ~ /(\.|wp-config.php|readme.html|license.txt) { deny all; }
Create a file named wpnocache.conf at /usr/local/nginx/conf/wpnocache.conf and add following lines:
# Add trailing slash to */wp-admin requests.
rewrite /wp-admin$ $scheme://$host$uri/ permanent;
Edit your domain's Nginx vhost file. Following example is for WordPress installed at /wp
Add the following snippets of code
location /wp {
include /usr/local/nginx/conf/wpsecure.conf;
include /usr/local/nginx/conf/wpnocache.conf;
try_files $uri $uri/ @memcached;
}
If WordPress installed at root of your site edit existing location / to following
include /usr/local/nginx/conf/wpsecure.conf;
include /usr/local/nginx/conf/wpnocache.conf;

location / {

# block common exploits, sql injections etc
#include /usr/local/nginx/conf/block.conf;

# Enables directory listings when index file not found
autoindex on;

try_files $uri $uri/ @memcached;

}
Add include /usr/local/nginx/conf/wpffpc.conf
include /usr/local/nginx/conf/wpffpc.conf;
include /usr/local/nginx/conf/staticfiles.conf;
include /usr/local/nginx/conf/php.conf;
#include /usr/local/nginx/conf/phpstatus.conf;
include /usr/local/nginx/conf/drop.conf;
#include /usr/local/nginx/conf/errorpage.conf;
Full Nginx VHOST config
server {
# listen 80;
listen 80 default_server;
server_name localhost;

  access_log /home/nginx/domains/yourdomain.com/log/access.log combined buffer=32k;
  error_log /home/nginx/domains/yourdomain.com/log/error.log;

  root /home/nginx/domains/yourdomain.com/public;

# ngx_pagespeed & ngx_pagespeed handler
#include /usr/local/nginx/conf/pagespeed.conf;
#include /usr/local/nginx/conf/pagespeedhandler.conf;
#include /usr/local/nginx/conf/pagespeedstatslog.conf;

# limit_conn limit_per_ip 16;
# ssi on;

location / {

# block common exploits, sql injections etc
#include /usr/local/nginx/conf/block.conf;

# Enables directory listings when index file not found
autoindex on;

# Shows file listing times as local time
# autoindex_localtime on;

# Enable for vBulletin usage WITHOUT vbSEO installed
# try_files $uri $uri/ /index.php;

}

# example nginx-http-concat
# /csstest/??one.css,two.css
#location /csstest {
#concat on;
#concat_max_files 20;
#}

location /wp {
include /usr/local/nginx/conf/wpsecure.conf;
include /usr/local/nginx/conf/wpnocache.conf;
try_files $uri $uri/ @memcached;
}

include /usr/local/nginx/conf/wpffpc.conf;
include /usr/local/nginx/conf/staticfiles.conf;
include /usr/local/nginx/conf/php.conf;
#include /usr/local/nginx/conf/phpstatus.conf;
include /usr/local/nginx/conf/drop.conf;
#include /usr/local/nginx/conf/errorpage.conf;

}
Restart Nginx and php-fpm services
service nginx restart
service php-fpm restart
or via command shortcut
nprestart
4. Check to see if WP-FFPC plugin is working
By default WP-FFPC Plugin only caches for guests, so to check that cache is working, log out of WordPress Admin Dashboard and in SSH telnet run curl command to check page header for the X-Cache-Engine: WP-FFPC with memcached via PHP line.
curl -I http://yourdomain.com/wp/
HTTP/1.1 200 OK
Server: nginx centminmod
Date: Fri, 19 Jul 2013 00:21:04 GMT
Content-Type: text/html;charset=utf-8
Connection: keep-alive
Vary: Accept-Encoding
Cache-Control: no-store, no-cache, must-revalidate, max-age=0, post-check=0, pre-check=0
Pragma: no-cache
Expires: Fri, 19 Jul 2013 00:21:04 GMT
X-Pingback: http://yourdomain.com/wp/xmlrpc.php
X-Cache-Engine: WP-FFPC with memcached via PHP
Check memcached server stats and cached keys via memcached-tool which is automatically installed with Centmin Mod
command usage guide
memcached-tool
Usage: memcached-tool <host[:port] | /path/to/socket> [mode]

memcached-tool 10.0.0.5:11211 display # shows slabs
memcached-tool 10.0.0.5:11211 # same. (default is display)
memcached-tool 10.0.0.5:11211 stats # shows general stats
memcached-tool 10.0.0.5:11211 dump # dumps keys and values
memcached-tool localhost:11211 stats
#localhost:11211 Field Value
accepting_conns 1
auth_cmds 0
auth_errors 0
bytes 91589
bytes_read 105993
bytes_written 320173
cas_badval 0
cas_hits 0
cas_misses 0
cmd_flush 2
cmd_get 85
cmd_set 29
cmd_touch 0
conn_yields 0
connection_structures 7
curr_connections 5
curr_items 19
decr_hits 0
decr_misses 0
delete_hits 0
delete_misses 0
evicted_unfetched 0
evictions 0
expired_unfetched 1
get_hits 46
get_misses 39
hash_bytes 524288
hash_is_expanding 0
hash_power_level 16
incr_hits 0
incr_misses 0
libevent 2.0.21-stable
limit_maxbytes 8388608
listen_disabled_num 0
pid 4772
pointer_size 64
reclaimed 2
reserved_fds 20
rusage_system 0.318951
rusage_user 0.015997
slab_reassign_running 0
slabs_moved 0
threads 4
time 1374195697
total_connections 143
total_items 29
touch_hits 0
touch_misses 0
uptime 1177
version 1.4.15
To check Memcached server's cached keys, you can do that via libmemcached and memcat command. Which is automatically installed on Centmin Mod.
memcat --servers=localhost meta-http://yourdomain.com/wp/
memcat --servers=localhost data-http://yourdomain.com/wp/
Second line calls the memcached key data-http://yourdomain.com/wp/ which would output the contents of the cache, which is the full front WordPress index html contents.
If you get following error
error on data-http://yourdomain.com/wp/(NOT FOUND)
Means key is not in memcached or key expired. So revisiting page at http://yourdomain.com/wp/ will re-populate cache and try again.
5. Enabling ngx_pagespeed module
For full install guide and info for ngx_pagespeed module read info here.
Quick guide, to enable ngx_pagespeed module, in Nginx VHOST uncomment these 3 lines by removing hash # in front of them:
# ngx_pagespeed & ngx_pagespeed handler
#include /usr/local/nginx/conf/pagespeed.conf;
#include /usr/local/nginx/conf/pagespeedhandler.conf;
#include /usr/local/nginx/conf/pagespeedstatslog.conf;
changing to
# ngx_pagespeed & ngx_pagespeed handler
include /usr/local/nginx/conf/pagespeed.conf;
include /usr/local/nginx/conf/pagespeedhandler.conf;
include /usr/local/nginx/conf/pagespeedstatslog.conf;
Then enabling ngx_pagespeed via pscontrol file by typing within SSH telnet window:
pscontrol on
Check if Nginx ngx_pagespeed module is enabled by looking for X-Page-Speed header via curl command:
curl -I http://yourdomain.com/wp/
HTTP/1.1 200 OK
Server: nginx centminmod
Date: Fri, 19 Jul 2013 09:46:29 GMT
Content-Type: text/html; charset=UTF-8
Connection: keep-alive
Vary: Accept-Encoding
X-Pingback: http://yourdomain.com/wp/xmlrpc.php
Cache-Control: max-age=0, no-cache
X-Page-Speed: 1.6.29.3-3270
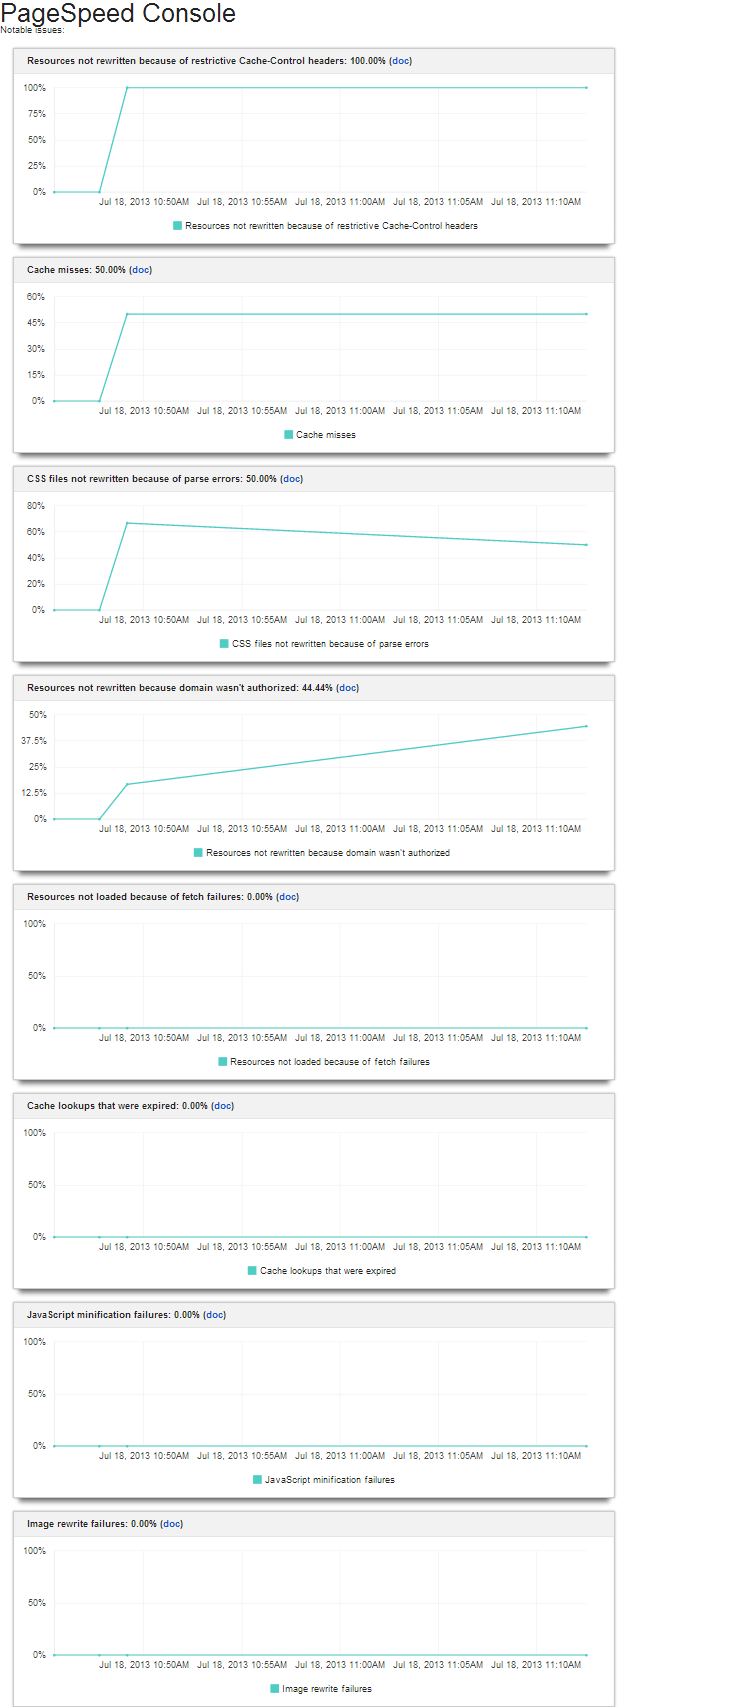
Then if you want, you can enable PageSpeed console following the steps outlined here.
Example PageSpeed Console statistics. Click on image for full statistics screenshots.
A recommended list of must have Wordpress plugins:
- Acunetix Wordpress Security Plugin. Check support forum for any issues.
- Sucuri Security Malware Scanner. Check support forum for any issues.
- Akismet. Check support forum for any issues.
- Wordpress Firewall
- Crayon Syntax Highlighter. Check support forum for any issues.
- GTmetrix for WordPress. Check support forum for any issues.
- Responsive Lightbox. Check support forum for any issues.
- Disable XML-RPC - for Wordpress 3.5+ and higher security. Check support forum for any issues. XML-RPC Validation Tool
- Rename wp-login.php. Check support forum for any issues. With this enabled, Nginx vhost for wordpress site needs adding an additional rule where renamedloginurl is the name of the renamed wp-login.php page. Remember to restart Nginx server after making Nginx vhost file change.
location = /renamedloginurl/ { try_files $uri $uri/ /index.php?q=$request_uri; } - Limit Login Attempts. Check support forums for any issues.
- No Longer in Directory. Check support forum for any issues.
- WP Updates Notifier. Check support forum for any issues.
- Mail On Update. Check support forum for any issues.